Showing posts with label Entice. Show all posts

Tuesday, July 13, 2010

A Global Menagination – Part 2


The Birth of a Planet
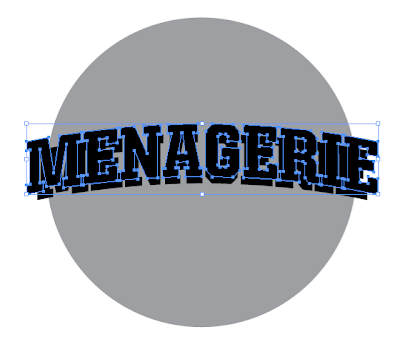
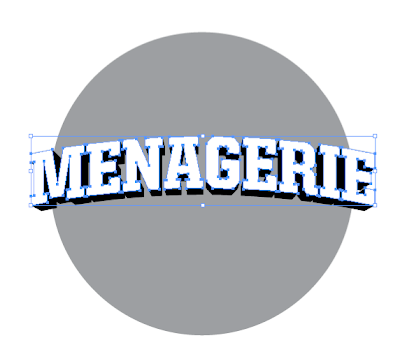
Now that the type is complete, we can start working on the planet.


Step 1: Select a texture from a rock, or experiment with different textures to see which works best for the planet.
Step 2: Create a new document, use the elliptical marquee tool, hold the SHIFT key and drag your mouse in order to make a perfect circle. Now, fill the circle with a solid color LAYER>NEW FILL LAYER>SOLID COLOR.
Step 3: Open the rock texture document in Photoshop and drag the image onto your circle document. Group the rock texture as a clipping group to the circle by clicking in between layers while holding down OPTION.


Step 4: Right click on the circle to bring up its selection. With your texture layer selected, apply the spherize filter (FILTER>DISTORT>SPHERIZE) on the rock texture. Next, add a curves adjustment layer (LAYER>NEW ADJUSTMENT LAYER>CURVES) above the texture layer to adjust contrast to surface texture as needed.


Step 5: Right click on the circle layer to bring up its selection. Fill a new layer with black and deselect the layer. Apply a gaussian blur filter to the layer to get a soft edge for the planet’s shadow. Clip the image to the circle layer to get rid of the excess areas of the shadow. Now change the layer mode from normal to multiply and lower the opacity to 85%. Feather the edge to make the transition of the shadow believable.


Step 6: Give the planet a little bit of color by adding a gradient map adjustment layer (LAYER>NEW ADJUSTMENT LAYER>GRADIENT MAP) above the rest of the other layers. Select a color for your planet and change the layer mode from normal to hue.


Step 7: We will now add bodies of water to make the planet look more believable. On a new layer, select a dark blue color and use a hard-edged brush to brush in some areas to represent the ocean. Reference other images of planets for help as needed.


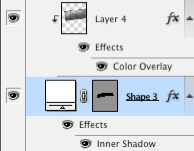
Step 8: In order to create a sense of depth to the water, apply an inner glow to the blue ocean layer.


Step 9: Create a bursting effect from the planet. First, create a new layer and use a dark color to draw in some cracks in the planet. Then, switch the layer mode to overlay.


Step 10: After the cracks are drawn in, right click on the layer to bring up its selection. Create a new layer above the cracks layer and apply a lighter color to airbrush in. Now, deselect the the layer and apply a gaussian blur to the glow.


Step 11: Create some rays that are bursting out of the planet. This is a fairly simple trick that can be useful in creating some really effective rays. Start by creating a new document (8.5 x 11"). Press "D" on your keyboard to bring your color palettes to default black and white. Use the gradient tool and drag from top to bottom on your document to get the following image.


Step 12: Go to FILTERS>DISTORT>WAVE. Try to get a variation of thick and thin lines by experimenting with the different sliders. Click “OK”.


Step 13: Go back to FILTER>DISTORT>POLAR COORDINATES. Make sure "rectangular to polar" is selected and click “OK”. Invert (apple + I) the image and drag it onto the planet document.


Step 14: Now that the rays are done change the layer mode to color dodge and apply a gaussian blur to the rays layer.


Step 15: Apply a layer mask to the rays layers and mask out the areas of the ray that wouldn't shine through the planet.


Step 16: Now, the rays need a little variation. Add a new layer and use your gradient tool (set to radial), use the foreground to transparent setting and start adding a little bit of glows in different areas of the cracks.


Step 17: Add some night lights to the planet. Search for "earth lights at night" for reference. After you find a nice image for reference. Bring the image to the planet document and set the layer mode to color dodge.


Step 18: Mask out the areas of the image to fit onto the land areas of the planet.

Below are the links to PART ONE and THREE of the TUTORIAL

A Global Menagination - PART ONE

A Global Menaagination - PART THREE


Tuesday, June 1, 2010

A Global Menagination – Part 1


Menagerie Creative’s illustrator and designer Tony Hsu invites you to journey along as he celebrates our multi-cultural studio with a one-of-a-kind poster and study of planetary formation.


PART ONE: Typographic Architecture

Constructing the dimensional typography for this project requires both Adobe Illustrator and Photoshop. Begin by designing the letterforms in Illustrator, then export the paths into Photoshop to apply lighting and textures.


Step 1: Create a circle to establish an idea of how the type should sit on the sphere. Select a bold font that will help the type read once distorted.


Step 2: Warp the text by going under EFFECT>WARP>ARC. Set the arc bend to approx 12%.


Step 3: Make a copy (apple+c) of the original type in case changes need to be made to it later. After the type has been warped, expand the type into paths by selecting OBJECT>EXPAND APPEARANCE. After expanding, copy (apple+c) and paste in front (apple+f). Adjust the type according to the correct perspective and scale it by holding shift+option+drag just slightly.


Step 4: Next, make a copy (apple+c) of the type into the clipboard. (This will be needed later). Now go to OBJECT>BLEND OPTIONS to modify the blend. Change the spacing to "specified steps" and enter a setting of 30. Click “OK” when you’re done. Select both of the types, and go to OBJECT>BLEND>MAKE. Now paste in front(apple+f) the type from the clipboard and change the color to white.


Step 5: Now that the type is okay, import the paths into Photoshop to add texture and lighting effects!

First, in the Illustrator file, copy the “blend” then paste (apple+v) in Photoshop as “smart object”. Second, in the Illustrator file, copy the “planet” then paste in Photoshop as “smart object”. Third, in the Illustrator file, copy the “face” then paste in Photoshop as “shape layer”.

Now that we have our type properly laid out on the planet we can begin adding textures and background to the rest of the type.


Step 6: You should have 3 layers in your Photoshop document.
1) planet
2) blend of the type
3) face of the type.


Step 7: Now to create a drop shadow on the type.

a) Apple+left click the blend layer to select it.
b) Create a new layer and label it shadow, fill the selection with black by
going to EDIT> FILL. Choose foreground color and make sure that it is black.
c) Deselect the shadow layer, and apply a gaussian blur by going to FILTER>BLUR.
d) Make a clipping mask of the shadow layer onto the planet layer by holding down the option key and clicking in between the shadow and planet layer. This removes the shadows outside the planet’s area.


Step 8: Next, bring in a texture for your type. Place it on top of your face layer and make a clipping mask (option+click in between the layers). Then, apply an inner shadow to the face layer in order to give the type a little more depth. Add some color to the texture layer by adding a color overlay effect, set that effect to multiply to let the texture underneath show through.

* once your texture is laid onto the type. Change its layer mode to a setting that will make your type legible.


Step 9: Now that we have some color and texture on the type. Let’s give it a little variation (dark and light) in values so that it doesn't look so mechanical. Option+left click on the face layer to bring up its selection. Go to SELECT>MODIFY>CONTRACT. Enter a value that scales the selection so that you can apply some color to the inside of the type.

Once you have your selection, go to SELECT>MODIFY>FEATHER and enter a value anywhere from 10~20.

With your selection still available, create a new layer and name it variations and brush in darks and lights using a soft-edged brush. Press “x” to change from black or white when in the brush mode. After you are satisfied with your darks and lights, change the variations layer from normal to overlay.


Now you have your type all set up for the next tutorials!


Below are the links to PART TWO and THREE of the TUTORIAL

A Global Menagination - PART TWO

A Global Menaagination - PART THREE

Wednesday, May 5, 2010

Thank you istock users!


A special thank you to all our istock fans for their continued support as today we hit our 1000 download milestone.

If you’re looking for graphic styled explosions, transportation graphics, entertainment related photography or the ubiquitous red bow please feel free to visit us at our istock portfolio.

Tuesday, May 4, 2010

THE STAR WARS AUCTION IS HERE!


May the 4th Be With You!

Yes, it’s finally here. That day that comes once a year when we watch the Star Wars Saga unfold from the unbelievable talents of a young boy to the redemption of a father, practice our lightsaber duals and snack on Wookie Cookies.

Here at Menagerie, we are also celebrating in another way. Exactly one month ago, each of our creative forces was tasked to create a Star Wars inspired product that simply could not be purchased in a store. To further challenge the artists, they could only use recycled or reclaimed materials – nothing could be purchased from the traditional retail environment. It was swap meets, antique stores and Watto’s Shop only for this crew.

Finally, and most importantly, each artistic expression comes from the desire to simply share our love of these films while giving back to our local community. By creating a treasured item today out of what may have become landfill tomorrow, we hope to inspire others to do the same.
All proceeds from the sales of these auctions will benefit CHOC (Children’s Hospital of Orange County).

So, what are you waiting for? The higher the bid, the stronger the force!

01 Darth Vader Doorknob

02 Bounty Hunter Cloak Rack


03 R2D2 Air Freshener

04 C-3P0 Desk Clock


05 Stormtrooper Earrings


06 Snowtrooper Keyring

07 Sandcrawler Storage Box

08 Darth Vader Picture Frame

09 Dark Side Fishing Lure Kit

10 Light Side/Dark Side Switch Plate Covers

Thursday, March 25, 2010

What is Aesthetics?


As designers, we know that the world is perceived through our five senses. Aesthetics refers to our judgment of taste as it relates to our language, mind and surroundings. Consider the most famous painting in the world...and how over time its aesthetics have been judged and given new context and meaning to each generation.

For the latest interpretation of our beloved Mona Lisa be sure to catch this video!


We want to know how you judge Aesthetics? Share with us your unique perception of beauty.

Friday, March 12, 2010

House Industries at Eames!


What an incredible evening of the most curvacious, sensuous and decadent typography since Alfred Roller’s Art Nouveau exhibition posters of 1903.

March 11, 2010 marked the official launch of House Industries Eames Font & Object Collection with an evening of fine wine, delectable fond
ue, jazz musings from the Mattson 2, screen printing demos from Fresh Pressed, and an installation of “a cornucopia of free-standing dimensional letterforms” inspired from the beautiful letterforms of the Eames Font Collection.

Menagerie Creative and a large group of CSUF alumni made the trek to Santa Monica and were among the first visitors to view the 5' custom architectural letterforms, play the Alexander Girard Memory Game and experience the musical stylings of the Mattson 2. Fresh Pressed offered a live demonstration of silkscreened prints & bags marked with classic Eames dingbats and typographical letterforms. A visit and photo op with Ken Barber topped off the evening of typographic delights and inspiration.


The exhibition, held at the Eames Office, 850 Pico Blvd., Santa Monica, CA is FREE and open to the public. The House Industries Eames exhibit runs from March 11th through April 1st. If you love the sensuality of elegantly modern letterforms, this is one event you can’t afford to miss.

Monday, March 8, 2010

Rainy Day Monday Blues!


In spite of what Barry Manilow may say, yes, it does rain in Southern California! In fact, this week, it poured in a few selective locations...including above the Menagerie production table!

Even this bleakest of weather can inspire some of the most stunning key art designs. So in honor of the mighty Mayan rain God Chac, and the all-powerful ruler of Mount Olympus Zeus, we share with our viewers a selection of 12 ‘misty’cal masterpieces. Now, can you two back off so our carpets can dry out?

Tuesday, March 2, 2010

Pulp Non-Fiction: 5 Unique Paper Stocks for Exceptional Projects.


1) Bier: Gmund
A unique paper made with shocking Iingredients. Do you like it dark, light, grainy, or hoppy? This paper is made out of the same ingredients as beer! You won’t get fined for holding this “bier” out in the public!


2) Reaction: Gmund
A shinning paper with cool lighting effects. Dark Red? Pink? Blue? or Green? It’s like a chameleon! This paper changes its color depending on the way the light falls across its surface. Get noticed with these interchanging color and get the reaction you want from others!


3) Eames: Neenah Paper
A collaborative work of art by Charles & Ray Eames & paper company. The unique Eames paper collections which comes in architecture, painting, & furniture are from the leading designers (husband & wife) in the field of product design, architecture & short films. These papers are bold & modern; sophisticated & clean; meticulous & well designed. If dress to impress is what you’re looking for, a simple change of paper stock to your project can change your impression as well.


4) Doublemates: WorldWin
A duplex paper with versatile appearances. Milk & cookies, Bert & Ernie, and movies & popcorn. All good things come in pairs. These 2-sided card stocks have a linen embossed pattern on both sides. Double the layer and double the fun!


5) Banana: Ecopaper
An eco-friendly paper. Yes, you heard it right! Banana has gone green! Made with 100% post consumer product (stalks of wasted banana plants). Feel the jungle on the palm of your hand and you can go bananas with it!

Compiled, written and featuring Maki Mori!

Sources: www.gmund.com, gmundbg.com, www.lcipaper.com, www.thepapermillstore.com,
www.ecopaper.com, www.treefreepaper.com, www.neenahpaper.com,
http://en.wikipedia.org/wiki/Charles_and_Ray_Eames